
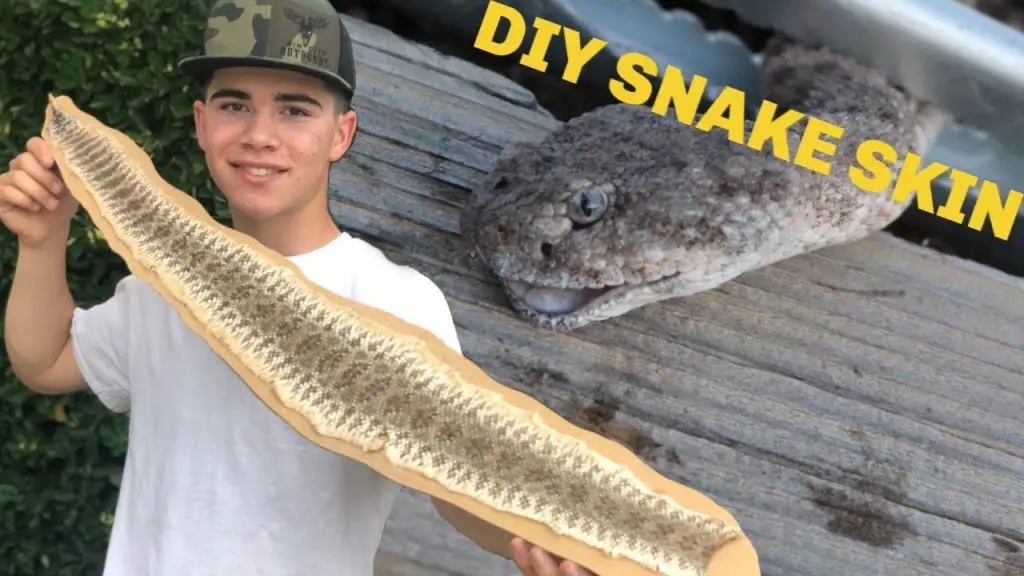
Are you a fan of taxidermy or just looking for a unique way to display your rattlesnake skin? Mounting a rattlesnake skin may seem like a daunting task, but with the right tools and a little bit of patience, it can be a rewarding and impressive display piece.
In this guide, we’ll walk you through the step-by-step process of mounting a rattlesnake skin, from preparing the skin to attaching it to a backing board. With our tips and tricks, you’ll be able to proudly display your rattlesnake skin in no time. Let’s get started!
Mounting a rattlesnake skin is an intricate process that requires patience and attention to detail. First, prepare the skin by removing any excess tissue and soaking it in warm water for a few hours. Next, stretch the skin over a board and secure it with tacks or pins. Allow the skin to dry completely before removing it from the board. Finally, you can mount the skin on a display or use it for other decorative purposes.

How to Mount a Rattlesnake Skin?
Mounting a rattlesnake skin can be a great addition to your collection of hunting trophies or as a decorative piece in your home. However, it is important to know the proper steps and techniques involved in mounting a rattlesnake skin. In this article, we will guide you through the process of mounting a rattlesnake skin, step by step.
Step 1: Skin Preparation
Before mounting the rattlesnake skin, you need to properly prepare it. Start by removing any excess flesh or fat from the skin. Use a sharp knife or scissors to carefully cut away any remaining tissue. Once the skin is clean, gently stretch it out on a flat surface and pin it down using tacks or pins. This will help the skin to dry evenly and prevent it from curling or shrinking.
Next, you need to clean the skin thoroughly. Use a mild detergent and warm water to wash the skin, making sure to remove any dirt or debris. Rinse the skin thoroughly and pat it dry with a clean towel.
Step 2: Mounting the Skin
Once the skin is clean and dry, it’s time to mount it. To do this, you will need to use a form or mannequin that is the same size as the snake. Carefully slide the skin onto the form, making sure to line up the head and tail with the appropriate areas on the form.
Next, use pins or tacks to secure the skin in place. Start at the center of the skin and work your way outwards, making sure to pull the skin tight and smooth as you go. Once the skin is securely attached to the form, you can begin to shape it to your desired position.
Step 3: Finishing Touches
Once you have the skin in place, it’s time to add any finishing touches. This can include eyes, fangs, or other details that will make the mount more realistic. Use a high-quality adhesive to attach these details to the skin, making sure to position them accurately.
Finally, you may choose to add a protective coating to the skin to help preserve it. This can be done using a clear varnish or other sealant. Apply the coating evenly and allow it to dry completely before handling the mount.
Benefits of Mounting a Rattlesnake Skin
Mounting a rattlesnake skin can be a great way to preserve a hunting trophy or to add a unique piece to your home decor. It can also serve as a reminder of your hunting experience and the thrill of the hunt.
VS: Buying a Pre-Mounted Skin
While it is possible to buy pre-mounted rattlesnake skins, there are several benefits to mounting your own. First, you have more control over the final product, allowing you to customize the mount to your own preferences. Additionally, mounting your own skin can be a fun and rewarding experience that adds to the overall satisfaction of the hunt.
Conclusion
Mounting a rattlesnake skin can be a challenging but rewarding experience. By following the steps outlined in this article, you can create a beautiful and realistic mount that will be a cherished addition to your collection. Whether you’re a seasoned hunter or just looking for a unique piece of decor, mounting a rattlesnake skin is a fun and exciting project that is sure to impress.
Frequently Asked Questions
What materials do I need to mount a rattlesnake skin?
To mount a rattlesnake skin, you will need a few materials. These include a mounting board, pins, a scalpel or sharp knife, needle and thread, and a preserving solution. You can purchase a mounting board at a taxidermy supply store or make one yourself from cardboard or foam board.
How do I prepare the rattlesnake skin for mounting?
Before mounting the skin, you need to prepare it properly. Start by soaking the skin in a preserving solution for several hours or overnight. This solution will help to preserve the skin and prevent it from decaying. Once the skin is fully soaked, remove it from the solution and lay it on a flat surface to dry. Use a cloth or towel to remove any excess moisture from the skin.
What is the best way to mount a rattlesnake skin?
To mount a rattlesnake skin, you should first lay it out on the mounting board and secure it in place with pins. Use a scalpel or sharp knife to carefully trim away any excess skin or tissue. Once the skin is properly positioned, use a needle and thread to sew it onto the board. Be sure to use a strong thread and make small stitches to avoid damaging the skin. Once the skin is mounted, you can add any additional decoration or details as desired.
How do I care for a mounted rattlesnake skin?
To care for a mounted rattlesnake skin, you should avoid exposing it to direct sunlight or moisture. Keep it in a cool, dry place and dust it regularly with a soft cloth. If the skin becomes dirty or stained, you can clean it with a mild soap and water solution. Avoid using harsh chemicals or cleaners that could damage the skin. With proper care, a mounted rattlesnake skin can last for many years.
Do I need any special skills to mount a rattlesnake skin?
Mounting a rattlesnake skin requires some basic skills, but it is not overly difficult. You will need to be able to handle sharp tools and have some basic sewing skills. It may take some practice to get the skin properly positioned and sewn onto the board, but with some patience and care, you can create a beautiful and long-lasting mount. If you are unsure about your skills or have never mounted a skin before, it may be helpful to watch online tutorials or take a taxidermy class.
Rattlesnake SKIN MOUNT – So Easy to DIY
In conclusion, mounting a rattlesnake skin can be a unique and interesting way to display your love for nature, while also adding a touch of rustic charm to your home décor. With the right tools and techniques, this process can be accomplished in just a few simple steps.
Remember to handle the skin with care and respect, and to take your time when stretching and mounting it onto your chosen surface. Whether you choose to display your rattlesnake skin on a wooden plaque, a canvas, or even a piece of furniture, the end result is sure to impress.
So why not give this DIY project a try and create a one-of-a-kind piece that will be a conversation starter for years to come? With a little patience and attention to detail, you can mount your very own rattlesnake skin and showcase your love for nature in a unique and creative way.
